Thank you for visiting Lasso the Lactose! I have officially moved to lassothelactose.com. For the most up to date information please follow me on...
Facebook: https://www.facebook.com/lassothelactose
Twitter: https://twitter.com/lassothelactose
Instagram: http://instagram.com/lassothelactose
Pinterest: http://www.pinterest.com/lassothelactose/
I appreciate you reading my blog and hope you enjoy the new look of Lasso the Lactose!
Monday, October 6, 2014
Thursday, July 24, 2014
Tzatziki

We had ordered gyros from a stand in the “plaka" of Athens, an area that lies just beneath the Parthenon. I took my first bite of this warm, soft pita topped with chicken, fresh tomatoes, french fries (who knew?) and of course tzatziki. The flavors were unbelievable— tangy, salty and rich but not overwhelmingly so. From then on, everywhere we went I topped anything I could with this delicious tzatziki. Back then I was popping about 20 Lactaid pills a meal so I could consume my precious dairy products. Little did I know your body could become intolerant to them! It’s safe to say I overdid it on the dairy and was sadly never able to use those Lactaid pills again. Once I returned, I thought I had to leave my great love for tzatziki behind. Thankfully after spending many years thinking back longingly to my delicious Greek discovery, I have created a lactose-free tzatziki recipe that tastes just as rich and fresh as it did in Greece.

Transfer the cucumbers into a strainer and place the bowl on top of the cucumbers to weigh them down. Allow to sit and drain for 30 minutes. Once complete, wring any excess water out of the cucumbers with either a clean kitchen town or paper towel.
Next, put the cucumbers into a food processor with one clove of minced garlic. Pulse gently until the cucumbers are evenly shredded into little pieces. Be careful not to create a paste with the cucumbers, just pulse until they are finely diced. The cucumbers should look as if they were grated with a cheese grater.

My favorite lactose-free yogurt brand is Green Valley Organics, and I never have a problem finding it at Whole Foods. Traditionally Greek yogurt is the base for tzatziki however this yogurt is very thick and tangy, making it the perfect substitute. This is just a suggestion, feel free to use your own favorite brand of plain lactose-free yogurt! If you find that extra tang or texture is needed, you can add a tablespoon of lactose free sour cream to your mixture.

In a medium sized bowl, add two cups of plain lactose-free yogurt. Transfer the cucumber and garlic mix into the bowl along with the dill and lemon juice. I use dry dill because I always have it in my pantry, but fresh dill would be great too! Mix together until all of the ingredients are incorporated evenly.

To finish the tzatziki, drizzle one teaspoon of good olive oil over the top for some added Mediterranean flavor! Salt and pepper to taste and transfer into a container for storing.

Tzatziki can be enjoyed in so many ways! Over the week I made shrimp with couscous and spinach topped with tzatziki, chicken gyros, and I even used it as a dipping sauce for fresh pita and grape tomatoes. It truly is delicious on everything! It’s fresh and rich flavors make it the perfect condiment for summer. Enjoy!
1 whole cucumber (seeded)
1 tsp salt for dehydrating cucumber
1 tsp olive oil
1 clove minced garlic
1/2-1 tsp dill
1/2 lemon juice
salt and pepper to taste
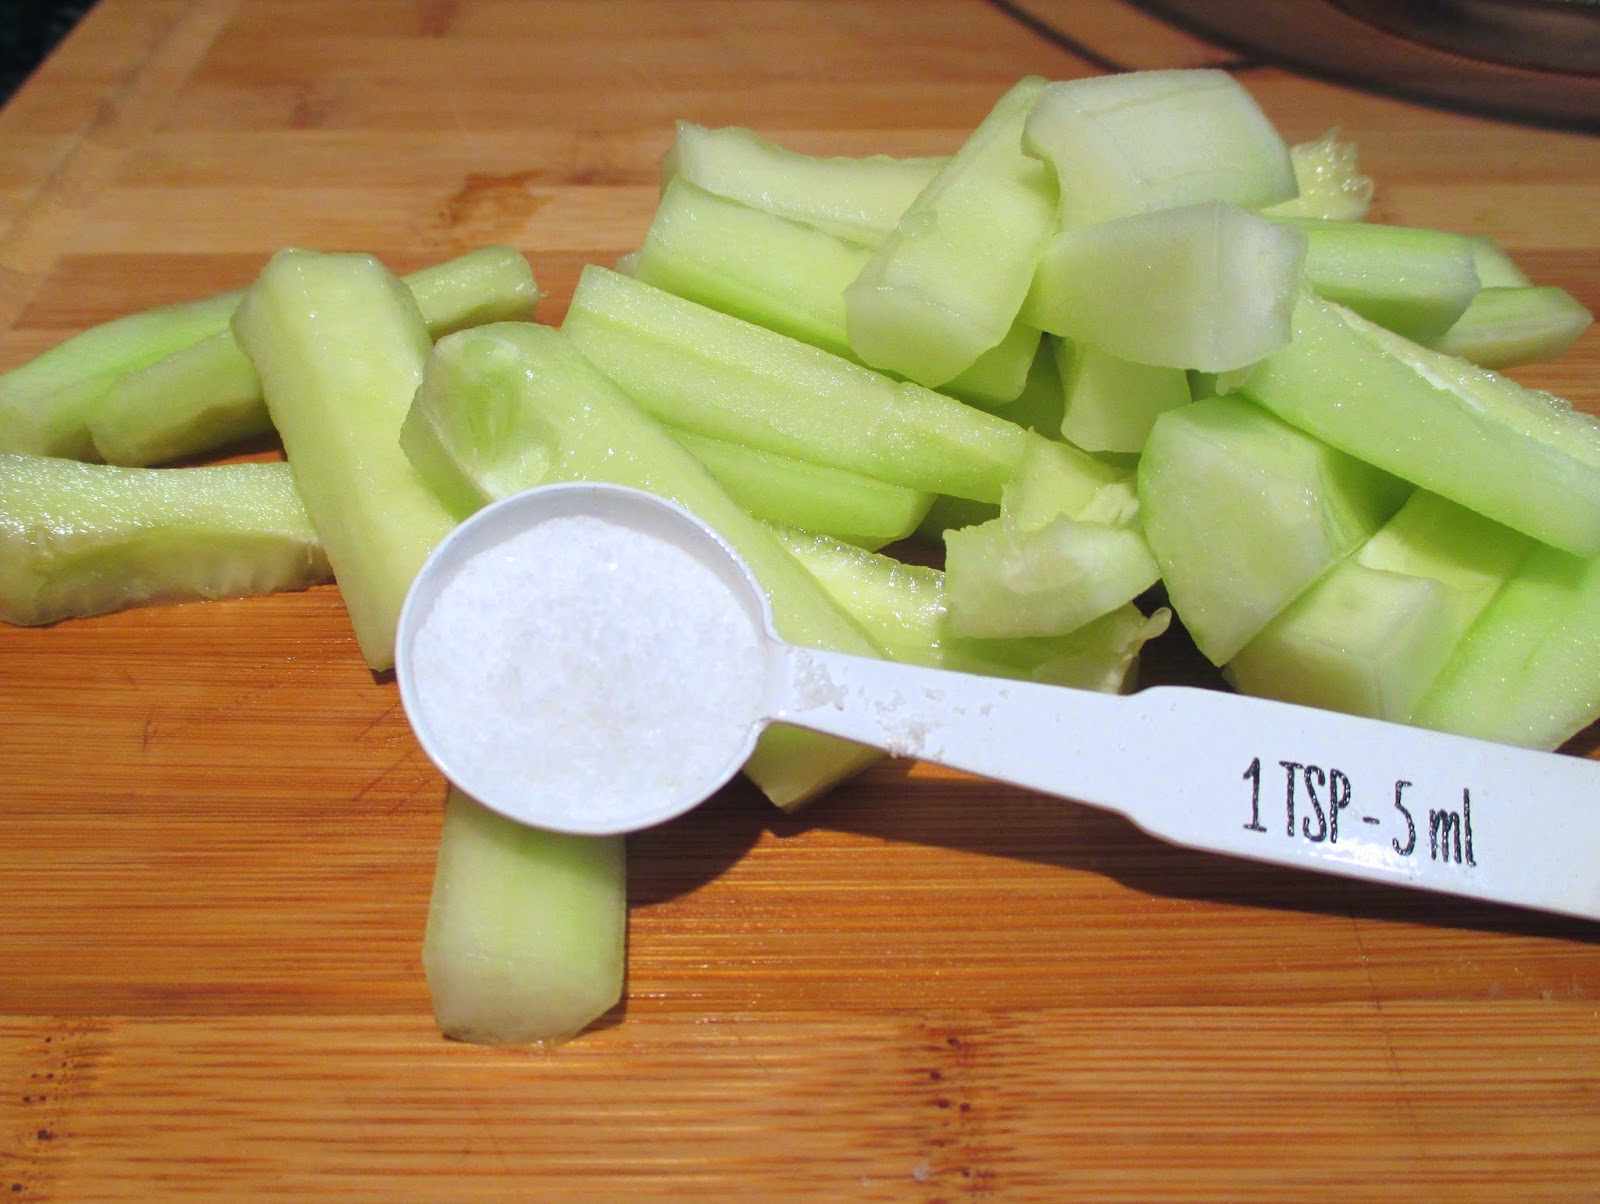
Start by peeling and seeding one cucumber. Cut into even cubes or stripes and place into a bowl. Add one teaspoon of salt to the cucumbers to aid in removing some of the excess water. Place the cucumbers into a strainer with a bowl on top for added weight, allow the cucumbers to drain for 30 minutes. Squeeze out any remaining water with a clean kitchen cloth or paper towel. In a medium sized bowl, put two cups of plain lactose-free yogurt in. Transfer cucumber and garlic into the bowl along with the dill and lemon juice. Mix together until all ingredients are incorporated evenly. To finish the tzatziki, drizzle one teaspoon of good olive oil over the top and combine. Add salt and pepper to taste and transfer into a container for storing.
Friday, June 13, 2014
Mascarpone Fruit Tartlets

I cannot tell you the last time I went a whole day without having dessert. Whether I have just a little nibble of chocolate or indulge in a yummy chocolate chip cookie, my day is never complete without something sweet. And I love when summer is finally here! Summer means that fresh berries are back in season, along with the very special desserts that call for them. All year long I look forward to the blueberry pies and strawberry shortcakes of summer.
I have been all about the bite-sized desserts recently because they satisfy my cravings without taking a huge toll on my waist line. This week I was craving a fresh, seasonal dessert, so I whipped up some delicious mascarpone fruit tartlets. I already had fresh blueberries and raspberries on hand that I knew I could incorporate into this recipe. As I talked about in my last post, mascarpone cheese is a great base for any sort of pie filling. It is creamy in texture and has a naturally light flavor that, with a few small additions, can be enhanced and taken in many directions. These tartlets are simple and refreshing. All you will need is some lactose-free mascarpone cheese, lactose-free whole milk, filo cups, lemon and of course, blueberries and raspberries (or any other berries of choice)!

We’ll begin with the filling. Take one cup of lactose-free mascarpone cheese and place it into a medium sized mixing bowl. Next add the zest of one lemon. The zest of a lemon helps to not only enhance the lemony flavor but also helps you enjoy the potent aromatics of the lemon in the finished product. Food is best when it appeals to all the senses! Add the lactose-free whole milk, sugar, and freshly squeezed lemon juice.

Beat the mixture until soft peaks form. Be careful not to overbeat! Overbeating will cause a dense consistency, almost like butter, and you want it to be soft so it will be easy to place into the delicate filo cups. I used 12 pre-baked frozen filo dough cups that I thawed out prior to filling. I did not bake my filo cups further because I wanted to maintain the extra flaky texture. If you are making these in advance to serving you could bake them for a minute or two to add a little crispiness. However, avoid making them too far in advance— if the filling is in the cups for too long they may become somewhat soggy. Once the mixture forms light peaks, spoon it into the filo cups, filling each one.

Once the cups were filled I garnished half with a single raspberry and the other half with three blueberries. Sprinkle them with some confectionary sugar (as a finishing touch) and they are ready to eat! The filo cups were the perfect pastry shell for this light and creamy filling. The simple, fresh flavors were just what I hoped for in this seasonal treat. These desserts were so effortless to make and you can easily alter the recipe to incorporate your favorite summer fruits! I will definitely be serving these mascarpone fruit tartlets throughout the summer.
1 cup lactose-free mascarpone cheese
1/4 cup lactose-free whole milk
zest of 1 lemon
2 tsp lemon juice
1 tbsp sugar
6 raspberries
18 blueberries
confectionary sugar (to sprinkle on top)
For the filling, take one cup of lactose-free mascaropne cheese and place it into a medium sized mixing bowl. Next add the zest of one lemon. Add the lactose-free whole milk, sugar and freshly squeezed lemon juice. Beat mixture until soft peaks form. Thaw 12 pre-baked frozen filo dough cups. Once thawed, fill each cup with a spoonful of mixture. Top half with one raspberry and the other half with three blueberries each. Sprinkle confectionary sugar over the tartlets to finish. Enjoy!
Thursday, June 12, 2014
Mascarpone Cheese

In continuing my lactose-free cheese conquest, I decided to take on the task of making mascarpone cheese. Mascarpone cheese is an Italian cheese that I have discovered as of late. Living in the historically Italian-inspired neighborhood of Boston has heightened my curiosity to explore this delicious cuisine. Immediately upon walking out my door I smell garlic and fresh bread being baked. It would be impossible not to be inspired and tempted by the rich and decadent Italian food that surrounds me!
Having already tackled ricotta cheese, I thought it would be appropriate to venture to mascarpone next. Homemade mascarpone calls for many of the same techniques that are used in making ricotta, but mascarpone has a sweeter flavor and creamier texture than ricotta. Lately, there are a few recipes I’ve wanted to try (some sweet and some savory) that call for mascarpone, furthering my motivation to master a lactose-free recipe for this cheese! Mascarpone is most commonly known as the staple ingredient in tiramisu, but it can be used in a wide variety of recipes and is often used as a substitute for cream cheese due to its creamy texture. Since this recipe only calls for two ingredients, I knew it would be a basic yet versatile cheese to add to my lactose-free repertoire.

For this recipe you will need a thermometer, a medium sauce pan, a strainer and a cheese cloth. The ingredients are so simple - all you need is heavy cream and lemon! Some recipes call for tartaric acid, which is an acid produced by grapes (there are an abundance of grapes in Italy, so naturally this is an easy ingredient to have at their disposal) but lemon works just as well and is much easier to find.


Next, set your strainer in a bowl large enough to allow the excess liquid (the whey) to drain and line the strainer with a cheese cloth. Fold the cheese cloth so it is about four layers thick. After the lemon and cream mixture has cooled, transfer it to the cheese cloth lined strainer, cover with plastic wrap and allow the mixture to drain. Set in the refrigerator for 8-12 hours.

And viola, lactose-free mascarpone cheese! To finish, discard the whey and transfer the cheese into an air tight container for storage. When the process was all said and done I was left with a little over a cup of mascarpone. With just two ingredients and a few simple steps you can create a delicious lactose-free Italian cheese with an incredible creamy, light texture. Mascarpone sparked my interest because I have been dying to try some cream sauces, risotto and dessert recipes that have called for this cheese. Also with strawberries, blueberries and raspberries coming into season this is a great cheese to enjoy simply with fresh fruit (sometimes less is more). I am excited to have another lactose-free cheese to work with in the kitchen!
Recipe Details:
Ingredients:
2 cups lactose-free heavy cream (or lactose-full!)
1 tablespoon freshly squeezed lemon juice.
In a medium sauce pan, heat two cups of heavy cream over medium heat to 190 degrees Fahrenheit, stirring constantly. Once the temperature of the cream has reached 190 degrees add the lemon juice. Continue stirring the mixture constantly at 190 degrees for five minutes.
After the five minutes is over, allow the mixture to cool off the heat for 30-45 minutes. Next set a strainer in a bowl, large enough to allow the excess liquid to drain and line the strainer with a cheese cloth. Fold the cheese cloth so it is about four layers thick. After the lemon and cream mixture has cooled transfer to cheese lined strainer, cover with plastic wrap and allow the mixture to drain and set in the refrigerator for 8-12 hours.
Once chilled, discard the excess liquid and transfer the mascarpone cheese into an air tight container. Store mascarpone cheese in the refrigerator.
Recipe Details:
1 tablespoon freshly squeezed lemon juice.
Friday, May 23, 2014
Tomato Basil Soup


The best advice I can give to anyone making homemade soups is to have everything requiring chopping cut and ready to go before you begin the cooking process. This makes it so much easier to transition from one step to the next. To begin, chop the onion, carrots, tomatoes and basil. For this recipe you don’t have to spend too much time perfecting your dicing—it’s important for the ingredients to be cut at similar sizes to ensure even cooking, however these can be roughly chopped because they will end up in the blender.
In a large pot, heat 3 tablespoons of olive oil for about 30 seconds. Then add the carrots and red onions. Onions make me cry so I always chop them last and get those babies into the pot as fast as I can. I have tried every onion-chopping trick in the book but despite all off my efforts, they get me every time! Sauté the onions and carrots over medium heat for about 8-10 minutes. Once they’ve begun to soften, add 2 cloves of minced garlic and stir for about a minute, being careful not to burn the garlic.

Next add the tomatoes, tomato paste, basil, sugar, chicken stalk, salt and pepper. Stir all of the ingredients together, crank up the heat and bring to a boil. Once the soup is boiling, lower the heat and allow the soup to simmer uncovered. Simmer for about 30 minutes, until the tomatoes and carrots are tender. When tender, add 3/4 cup of lactose-free whole milk and allow to cool for about 10 minutes. Next, pour about 1/3 of the mixture in the blender and puree to desired texture. Hold on tight to that lid!! Repeat with the remaining 2/3rds until all of the soup has been pureed. I like mine to be a little chunky to give the soup some added texture, but it can be made as smooth or as chunky as you like!
When ready to serve, reheat the soup in a large pot. Transfer the soup into serving bowls and (I would highly suggest) garnish with a little fresh basil! This soup was so easy to make and even easier to clean up after because it only requires one pot! Whipping up this recipe resulted in a simple meal-planning week and I was able to enjoy a soup that despite its simplicity was rich, creamy AND healthy.
Recipe Details:
Ingredients:
3 tablespoons olive oil
2 medium sized red onion
2 carrots
2 cloves minced garlic
4 pounds vine ripened tomatoes
1 1/2 teaspoons sugar
1 tablespoon tomato paste
1/4 cup chopped basil leaves (save a little for the garnish)
3 cups chicken stalk
2 teaspoons salt
1/2 teaspoon pepper (more to taste)
3/4 cup lactose-free whole milk
Chop carrots, onions, tomatoes and basil and set aside. In a large pot heat olive oil. Place the carrots and onions in the pot and sauté over medium heat for 8-10 minutes, until they begin to soften. Add minced garlic and stir for about 1 minute. Next add the sugar, tomato paste, basil, tomatoes, chicken stalk, salt and pepper. Stir to incorporate ingredients evenly. Bring to a boil and then reduce to a simmer over medium-low heat. Allow to simmer uncovered for 30 minutes, until the vegetables are very tender. Once the vegetables have softened, add the lactose free whole milk. Stir and then transfer into the blender, blending 1/3 of the soup at a time. Blend to desired texture. Reheat the soup in a large pot when ready to serve. Transfer to bowls and garnish with remaining basil!
2 medium sized red onion
2 carrots
2 cloves minced garlic
4 pounds vine ripened tomatoes
1 1/2 teaspoons sugar
1 tablespoon tomato paste
1/4 cup chopped basil leaves (save a little for the garnish)
3 cups chicken stalk
2 teaspoons salt
1/2 teaspoon pepper (more to taste)
3/4 cup lactose-free whole milk
Thursday, May 15, 2014
For the Love of Grilled Cheese


It is always an interesting conversation when you tell people who know you are lactose intolerant, that one of your favorite foods is grilled cheese. But as I’ve talked about before, cheddar cheese is a lactose-intolerant’s best friend and the perfect cheese selection for a grilled cheese sandwich! Who would have thought the simple pairing of bread and cheese could produce such a magical result? It can be dressed up with sweet or savory trappings, or remain the down-to-earth, iconic sandwich we loved as kids. White bread with cheddar cheese, grilled to perfection on a buttery skillet is my absolute favorite way to enjoy this dish. Reaching the last bite never fails to bring on a pang of sadness that leaves me wanting more.
Sometimes, however, I find my inner “foodie” wanting to take my “go-to” grilled cheese to the next level. With the essence of grilled cheese being bread and cheese, it is the perfect vehicle for additional toppings resulting in so many different, delicious combinations– culinary exploration at its best! Grilled cheese has a very special place in my heart because it was the first meal Mike and I ever cooked together (baby steps). I have been mulling over a few different grilled cheese recipes that I have been wanting to try, so I thought it would be ever so fitting to try out these new recipes with Mike on our date night-in. Thankfully there are so many great lactose free cheese options available such as, cheddar, parmesan, asiago and lactose free ricotta. Any combination of these cheesed with the toppings of your choice can bring your grilled cheese to a level that even the biggest foodies will be impressed with.
Bacon and Jalapeño Cheddar Grilled Cheese
Mike LOVES bacon, so I wanted to incorporate it in one of our grilled cheeses. I thought I would spice it up by using some jalapeño cheddar, instead of classic cheddar cheese. For both recipes, we used fresh plain white bread from the local bakery right downstairs
To start off, cook 2-3 thick slices of bacon in a frying pan, set aside to cool and then crumble. Leave about 1 tablespoon of bacon grease in the pan. This will be used to cook the grilled cheese in, enhancing the bacon flavor even more!

Next, butter two slices of bread on the sides that will be exposed to the pan. We were liberal with our butter, so I give you permission to be equally as generous!
Slice up the jalapeño cheddar to desired thickness and cover one slice of bread evenly with cheese. We used about 8 slices, a little less than 1/4 inch thick. Cover the cheese with the bacon crumbles and top the sandwich with the second piece of bread.
One final step, melting it all together! Heat the frying pan with the remaining bacon grease for about 30 seconds on medium-high heat and once warm, place the sandwich in the skillet. Cook the first side for about one minute, then carefully flip the grilled cheese over and cook the other side for another minute. I like to warm both sides of the sandwich in the beginning so that the cheese will melt evenly throughout and bind the sandwich together. Next, turn the heat down to medium-low so the bread won’t burn before the cheese is melted. Keep checking the bread and flipping from side to side until the bread is grilled to desired color and crispiness. I like mine a little more on the well-done side, nice and golden brown with crispy edges. Once the cheese is melted and the bread is perfectly grilled, take out of the skillet to cool, cut and serve!

You know you have the perfect grilled cheese when you cut it in half, pull it apart and have the gooiest cheese stringing between the two halves! These bacon, jalapeño cheddar grilled cheeses were cheesy, salty and had the perfect spicy zing to them.
Crab Meat and Chipotle Aioli Grilled Cheese
For our next grilled cheese, this winning combination came to me in a dream. Being from New England I love seafood. I have always loved a classic tuna melt sandwich so I thought how about changing it up and using crab instead. I knew that the combination of crab, cheese and chipotle aioli would create the flavor palate I was looking for. What I really love about this grilled cheese is that while it sounds quite fancy, it was truly very easy to make—perfect for impressing friends at a dinner party!

Just like the last recipe, begin by buttering the two slices of bread. Slice up about 8 pieces of cheddar cheese (the classic version this time) and place evenly on one half of the bread. Next, spread the chipotle aioli over the cheese slices. The great thing about aioli is that there is no dairy in it! It is a wonderful condiment and thankfully the main ingredient in it is eggs. I used store bought aioli for this recipe but you can always substitute with chipotle mayonnaise (also dairy free) if you can’t find it in your local grocery store. Whatever suits you! Be as liberal as you would like with the aioli, this is truly done to taste.
Using half a can of white crab meat (about 3 ounces), layer the crab on top of the cheese and aioli. Top with the second piece of bread and the sandwich is ready for grilling! Grill just as before— preheat the skillet for about 30 seconds, heat each side for 1 minute over medium-high heat, then turn down the heat to medium-low while the cheese melts. Take off the skillet once you’ve reached the desired color and crispiness, cool, cut and enjoy!

The buttery crab with the melted cheese and spicy aioli were to DIE for. These would also make great appetizers cut into quarters (or smaller) and served before dinner. It is tough to say which one of these new creations I liked best. They were so delicious yet so simple to make. That being said, there will forever be a special place in my heart for a classic grilled cheese, but it was really fun to take a night and experiment with a timeless recipe.
Now it’s time to get really cheesy…
As I shared earlier, grilled cheese is actually a sentimental meal for Mike and I. When we first started dating and were getting to know each other, we discovered our shared love for grilled cheese. Being the thoughtful man he is, he offered to cook me his special grilled cheese recipe. Unbeknownst to him at the time, my lactose intolerance was not a fact that I wanted to bring up on one of our first dates. Babbling about digestive issues really didn’t seem like something I should share with someone I was newly dating. It seems so silly now, but I was so embarrassed to tell him about my lactose intolerance that I almost cancelled the date, thankfully I didn’t!
I am glad I didn’t let my lactose intolerance get in the way because over 2 years later, we are still enjoying grilled cheeses together. I have learned not to be afraid to tell the world that I can’t eat dairy as it is what has empowered me to share my recipes and endeavors with you all! Over the years I have discovered that with just a few modifications, no one ever has to feel left out at meal time. I am so glad I was honest with Mike and I couldn’t be happier to have him helping me in the kitchen and trying out all of my lactose-free creations.
Don’t be afraid to share your lactose free stories!
Recipe Details:
Ingredients:
Bacon and Jalapeño Cheddar Grilled Cheese
8 slices of jalapeño cheddar cheese (enough to cover a slice of bread)
2-3 slices of thickly cut bacon
2 pieces of fresh white bread
butter
For the Bacon and Jalapeño Cheddar: To start off, cook 2-3 thick slices of bacon in a frying pan, set aside to cool and then crumble. Leave about 1 tablespoon of bacon grease in the pan. Next, butter two slices of bread on the sides that will be exposed to the pan. Slice up the jalapeño cheddar to desired thickness and cover one slice of bread evenly with cheese. I recommend about 8 slices, a little less than 1/4 inch thick. Cover the cheese with the bacon crumbles and top the sandwich with the second piece of bread.
For the Crab Meat and Chipotle Aioli Grilled Cheese
8 slices of cheddar cheese
3 ounces of white crab meat
chipotle aioli to taste
butter
Butter two slices of bread on the sides that will be exposed to the pan. Slice up about 8 pieces of cheddar cheese (the classic version this time) and place evenly on one half of the bread. Next, spread the chipotle aioli over the cheese slices. Using half a can of white crab meat (about 3 ounces), layer the crab on top of the cheese and aioli. Top with the second piece of bread and the sandwich.
For both
Heat the frying pan with the remaining bacon grease for about 30 seconds on medium-high heat and once warm, place the sandwich in the skillet. Cook the first side for about one minute, then carefully flip the grilled cheese over and cook the other side for another minute. Next, turn the heat down to medium-low so the bread won’t burn before the cheese is melted. Keep checking the bread and flipping from side to side until the bread is grilled to desired color and crispiness. Once the cheese is melted and the bread is perfectly grilled, take out of the skillet to cool, cut and serve!
Friday, April 25, 2014
Meat and Cheese Platter, For Everyone!

As I continue to mature as a young adult, I am trying to branch out and develop a more sophisticated palate. I often find, when out to dinner or grabbing drinks and appetizers with friends, the meat and cheese plate is a hot item on the menu. Being lactose intolerant it obviously isn’t my first choice however, driven by #fomo (fear of missing out) I decided to create a lactose-free and lactose-full meat and cheese plate with my friends for Girls Night! My very good friends Sarah and Alix have suffered with me through thick and thin and helped me face my many dairy trials and tribulations. Naturally they were very enthusiastic to take on the meat and cheese plate venture for our fun date.

Living in Boston, there are so many wonderful specialty food shops to try out. We went to our favorite delicatessen in the North End to seek out some expert advice. For lactose-free cheeses, I follow the mantra “the older the cheese, the safer it is”. Most cheeses naturally contain only 2% of lactose when made! JUST 2%! The majority of the lactose is discarded with the whey when the curds and whey are separated. Who knew that the whopping 2% could give me so much grief? As cheese ages, the bacteria (gross) that breaks down the cheese to make it parmesan, asiago, blue cheese, cheddar, you name it, digests the lactose - leaving it lactose-free and safe for me!
For meats, we went with pepperoni, salami and prosciutto. All three of these Italian meats are packed with flavor, spices and salt—what could be better! In the end, these selections made the ultimate Italian meat-and-cheese dream team. Any combination from this plate was absolutely to die for! We also included fig jam, crostini crackers and olives, all of which took this plate and our newly refined palates to the next level.

In addition to our meat and cheese platter, we quickly whipped up some bruschetta. We picked up a fresh baguette of Italian bread from our local bakery and sliced 6 even pieces. We laid them out on a baking sheet and lightly spread butter on top of each piece for some added flavor. I preheated my oven to broil on high and placed the sheet in the oven, checking frequently to see if they were ready. It took about 4 minutes to reach the perfectly toasted color I was looking for. Personally, I only toast one side of my bread when making bruschetta with fresh tomatoes and basil— this prevents it from being so crunchy that it is hard to bite into. When you have a fresh loaf of bread, the last thing you want to do is take away from the delicious flavor and fluffy texture!
For the tomato and basil mixture, I diced two tomatoes and placed them in a small bowl. I then combined olive oil, garlic, basil, salt and pepper and gave it a stir. That’s it! So simple and so delicious. Top your perfectly toasted bread with the tomato and basil mixture, grate some fresh parmesan cheese, and your bruschetta is ready to serve!

I have been friends with Alix and Sarah since we were very young, I am so thankful to continue to have them in my life as we grow older. We have experienced so much together over the years and after much time a part, we are finally back in the same city, making up for lost time! Truthfully, now that we are back together it is as if nothing ever changed. Despite all of the maturing and growing we have done as individuals, one fact remains. I still can’t eat dairy and I am so glad they accommodate for this when we get together. I hope you and your friends can enjoy this lactose-free and lactose-full meat and cheese plate together! Use it as an excuse to catch up with wonderful friends and try something new. Just like a great lactose-free cheese, friendship only gets better with age!
Recipe Details:
Ingredients
1 loaf of white Italian bread
2 large tomatoes
3 teaspoons fresh basil
1 clove garlic
2-3 tablespoons olive oil (to taste)
salt and pepper to taste
Preheat oven on broil, set to high. Slice bread about 1/2 inch thick. Spread lightly with butter and place in the oven about 3-4 minutes until toasted to taste. Check frequently to ensure the bread does not burn. Once toasted set aside.
Chop two tomatoes and place in a small bowl. Add 1 clove of minced garlic, chopped fresh basil and olive oil. Salt and pepper to taste. Stir until thoroughly mixed. Top bread with tomato mixture and serve!
2 large tomatoes
3 teaspoons fresh basil
1 clove garlic
2-3 tablespoons olive oil (to taste)
salt and pepper to taste
Tuesday, April 22, 2014
Chocolate Chip Cookies

Chocolate chip cookies are without a doubt a classic. They are undeniably delicious! Any time I find myself in their presence, I cannot resist. As simple as this dessert is, there are a wide variety of chocolate chip cookies out there. Chewy, gooey, crunchy, etc. One of the most important ingredients in chocolate chip cookies (other than the chocolate) is butter. Thankfully, with butter having trace amounts of lactose, it is safe to consume for those of us who are lactose free.

To start off, combine your dry ingredients: flour, baking soda and salt. Baking soda will help your cookies rise and give them that slightly fluffy texture. When adding salt, be sure to check whether your butter is salted or unsalted. Using unsalted butter allows you to be in control of the salt content and flavor. If you only have salted butter on hand, just add an additional pinch of salt since the salted butter will provide enough flavor.

Next combine butter (softened), white sugar, brown sugar and vanilla extract. I sift the granulated sugar to ensure there are no clumps (just a helpful hint). Beat the mixture until creamy. I highly suggest leaving your butter out on the counter for a few hours to soften rather than microwaving it. However, if you are in a pinch for time, microwave the butter for 5 seconds at a time and rotate the stick of butter until evenly softened. Be sure not to completely melt the butter. If the butter becomes too melted and warm it can throw off the texture of the cookie.

Once you have achieved a creamy consistency, add one egg at a time and beat until incorporated. After the butter, sugar, vanilla and egg mixture is smooth and evenly combined, incorporate your dry ingredients adding 1/3 of the dry mixture at a time. Scrape down the edges of the bowl to ensure all ingredients have been thoroughly mixed in.

Now for my favorite part… The chocolate! I use one whole 12oz bag of semi-sweet chocolate chips. Most recipes call for 2 cups which leaves just a few chocolate chips remaining in the bag, and I think that’s crazy. The more chocolate the better! No need to waste, plus the extra accounts for some of the chips I nibble on because I just cannot help myself.

To form each dough ball, scoop a teaspoon-sized ball of dough and drop it onto your cookie sheet. I typically use a cookie scoop when making cookies, but, the drop method allows my chocolate chip cookies to have a little more volume and density to them. Sometimes the old fashion way is the way to go. Evenly space the dough balls on the cookie sheet.

Place the sheet into an oven at 375 degrees for 8-10 minutes, depending on the oven and desired chewiness. I always set my timer for 8 minutes and check on my cookies to see how fast they are cooking. I find that the last few batches I make cook a little faster than the first few because the baking sheet is already warm. Once removed from the oven, allow to cool for about 5 minutes on the sheet, then transfer to a wire rack to finish off the cooling process.

Look for golden brown edges— they are the tell-tale sign that your cookies are ready. I like my cookies to be chewy with slightly crusted edges. Sometimes they look a little undercooked in the middle, but they will continue to cook on the baking sheet once they are removed. In addition, while they are cooling they will firm up and become the most delicious chocolate chip cookies you have ever had.
There is simply nothing better than a warm chocolate chip cookie, fresh out of the oven. Share these with your family and friends and they will love you forever! I have yet to meet anyone who did not like my chocolate chip cookies, so I hope you like them too. Let me know what you think!!
Recipe Details:
Ingredients
2 1/4 cups all-purpose flour
1 tsp salt
1 tsp baking soda
1 cup (2 sticks) softened butter
1 cup granulated sugar
1 cup brown sugar
2 teaspoons vanilla extract
2 eggs
12 ounces semi-sweet chocolate chips
Preheat oven to 375 degrees.
In a small bowl combine flour, salt, and baking soda. Set aside.
In a large mixing bowl combine softened butter, granulated sugar, brown sugar and vanilla extract. Beat until creamy. Add eggs, one at a time. Beat well after the addition of each egg.
Add flour mixture slowly, about 1/3 at a time and beat well. Finally add chocolate chips and stir until evenly incorporated. Using a teaspoon, drop rounds onto a cookie sheet and bake for 8-10 minutes. Let cool on cookie sheet for about 5 minutes and then transfer to a wire rack. Once cooled, enjoy!
Friday, April 4, 2014
Belgian Waffles & Whipped Cream

On Sundays... we brunch!
Last year Mike and I went on vacation to Belgium and were fortunate enough to
try true authentic Belgian waffles. These
are the kind of waffles you will have dreams about for the rest of your life,
they are THAT good! Belgium
is a place that has perfected some of my favorite treats - chocolate, beer and
of course, waffles. In my humble opinion, it is heaven on earth. I would absolutely love to go back and enjoy these treats
once again but for now, I will have to wait. Thankfully,
Belgian beer can be found in most liquor stores and my favorite chocolates can
be purchased online. True Belgian waffles, sadly, are not as easy to come by.
My Nana recently sent me
this wonderful baking book titled Cook's Baking Book that had a fabulous Belgian waffle recipe. As soon as I
saw this recipe I started reminiscing about those unforgettable waffles in
Belgium and I was hooked. So,
when I invited my friend Alix and her boyfriend over for brunch, I thought
Belgian waffles would be the perfect thing to serve. In addition to Belgian waffles, I decided to take it to the
next level with some homemade lactose free whipped cream. Never having worked with
yeast before, it was huge gamble to try this recipe when entertaining guests. I’m happy (and relieved) to
report that the gamble paid off— they were the best waffles I have had since being in
Belgium, lactose free and equally as delicious!
This recipe was
surprisingly simple, but it does require some advanced preparation. The waffle batter must be prepared 12-24 hours prior to
baking, which may seem a little tedious. However, it is a great excuse to be
prepared when you are having company over.

To start off I measured 1 and 3/4 cup lactose free milk and set aside.

Next I cut 8 tablespoons
of unsalted butter into smaller pieces. I
then poured the 1 and 3/4 cup of milk into a sauce pan, added the butter and
melted it over medium low heat. Once
the butter was fully melted, I turned the heat off and allowed the butter and
milk mixture to cool.


I began working on the dry ingredients by measuring out 2 cups of flour and placing it in a large mixing bowl. I then added the sugar, yeast and salt.
This recipe only calls
for 1 tablespoon of sugar (surprising, I know!), which my sweet tooth wasn’t sure would be enough. The
waffles in Belgium had this delicious pearled sugar in them that added a hint
of caramel flavor. I
wanted to recreate this same flavor but, having never used yeast before, I was
afraid to mess with the sugar to yeast ratio. You don't want the yeast to have too much sugar to nom on
or else your batter might come alive, just kidding (I hope). The
batter actually doubled in size over night with just one tablespoon of sugar, I
can't imagine what would have happened had I added more. Also, where I knew I
was going to make homemade whipped cream, making really sugary waffles might
have created a sugar over load. In
the future I want to experiment with pearled sugar in my Belgian waffles, but
for now I decided to take on only what I felt I could handle.

Once the butter and milk
mixture was fully cooled I slowly added it to my dry ingredients, whisking
until they were evenly combined. I then
poured in my eggs and vanilla extract, and stirred until everything was
thoroughly incorporated.

After combining all of
the ingredients, I covered my mixture with a lid (plastic wrap works too!) and
placed it in the fridge overnight. Do
not be alarmed when you wake up the next morning and see your batter—it will likely have doubled in size and lost the
beautifully consistency you left it with. Not
to fear, once whisked in the morning it will return back to its original form,
but will now have the wonderful ability to rise!

Now for the whipped
cream. Homemade whipped cream is so easy and tastes so much
better! To prepare, I put my mixing bowl in the freezer right when
I woke up. I always chill my mixing bowl in advance when making whipped
cream, as I find it helps the whipped cream to form its peaks faster. For
this recipe all I needed was a cup of heavy whipping cream, a little sugar and
vanilla extract. To make this lactose free I pretreated the whipping cream
with the lactase drops for 24 hours. So simple yet so delicious!


Whip the cream, sugar
and vanilla for about 3-5 minutes until soft peaks form. Whip
until desired texture—the longer you whip, the
firmer the mixture will become. We took some extra dollops of whipped cream and put it in
our coffee, which was fabulous and I HIGHLY recommend.
Once the whipped cream
is to desired texture, transfer to a bowl and set aside. If
you are going to make this in advance, cover the whipped cream with plastic
wrap and place in the refrigerator. Depending on how long it is in the refrigerator it may need
a quick whisk before serving.

Last and most
importantly, it was time to bake the waffles! I have an electric waffle iron, but the recipe actually
recommends using one that goes in the oven. This worked just fine, so whatever you have will do the
job! Coat one side of the waffle iron evenly with the batter,
making sure to fill the whole surface. Be careful not to pour too much batter on the iron, it WILL
overflow and make a huge mess. My waffles cooked very quickly in about 2-3 minutes so do
not walk away from them! I felt they were ready once they were golden brown. This
recipe yields about 8 waffles, so I cooked up all the batter and they were
ready to serve!

Yes, they were as fluffy
and delicious as they look!
We topped our waffles with whipped cream, syrup and fresh strawberries. YUM!!! I am glad they turned out well, the yeast was worth the gamble! Seeing as we ate every last bit, these waffles definitely met my Belgian waffle standards. As much as I would love to go back to Belgium, this recipe will tide me over in the meantime. I also was not able to have whipped cream on my waffles in Belgium but thankfully here at home, I can have all the lactose free whipped cream I want! Happy brunching!
Recipe Details:
Ingredients
Waffles:
1 3/4 cup lactose free milk
8 tablespoons butter
2 cups all-purpose flour
1 tablespoon sugar
1 1/2 teaspoons dry-active yeast
1 teaspoon salt
2 large eggs
2 teaspoons vanilla extract
Whip Cream:
1 cup heavy whipping cream
(pretreated to be lactose free)
1 teaspoon vanilla extract
2 teaspoons sugar
Cut up butter into 6-8 pieces.
Place butter and milk in a medium sauce pan over low heat until butter is
melted. Once butter is melted, set aside to cool. In a large mixing
bowl, combine flour, yeast, sugar and salt. Mix together until thoroughly
combined. Slowly whisk milk and butter mixture into the dry ingredients
until the batter is smooth. In a separate bowl whisk together the eggs
and vanilla. Add the egg and vanilla mixture to the batter, whisking until
evenly incorporated. Scrape down the sides of the bowl and then cover the
bowl and place in the refrigerator for 12-24 hours.
Once the batter has been chilled
and is ready to cook prepare the waffle iron to the manufacturer's
instructions. When the waffle iron is ready, remove the batter from the
refrigerator and give the batter a quick whisk. The batter will have
doubled in size. Use about 1 cup of batter for a 9 inch waffle iron,
cover the iron completely with the batter and cook per instructions or until
golden brown. Once cooked they are ready to serve!
For the whip cream take one cup of
lactose free whipping cream and pour into a chilled mixing bowl.
Add sugar and vanilla. Using a hand beater, beat for about 3-5
minutes until soft peaks form. Beat to desired firmness. Ready to
serve once desired texture is achieved.
Subscribe to:
Posts (Atom)